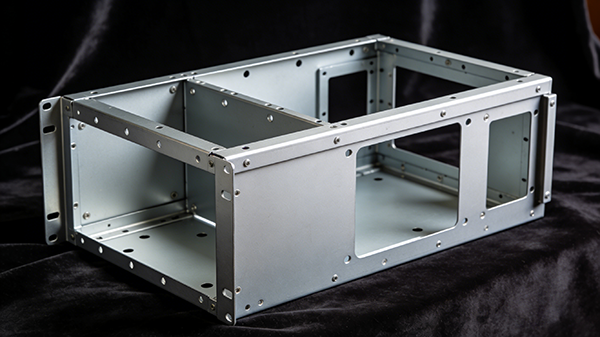
There’s nothing more frustrating than receiving a batch of sheet metal parts, lining them up for assembly, and finding out they don’t fit together the way they should. The holes don’t align. The brackets sit crooked. The enclosure doesn’t close flush.
I’ve been there. And if you’re reading this, chances are you have too.
After nearly two decades in this business, I’ve seen this problem more times than I can count. The good news? Most fit issues are avoidable. Let me walk you through the most common reasons parts don’t fit—and what you can do to fix them.
Why Fit Issues Happen
Before we get into solutions, let’s talk about what’s actually going on when parts don’t fit. In most cases, the problem isn’t that the parts are “bad.” It’s that something happened during the manufacturing process that changed the part in a way the drawing didn’t account for.
Here are the main culprits.
1. Springback in Bending
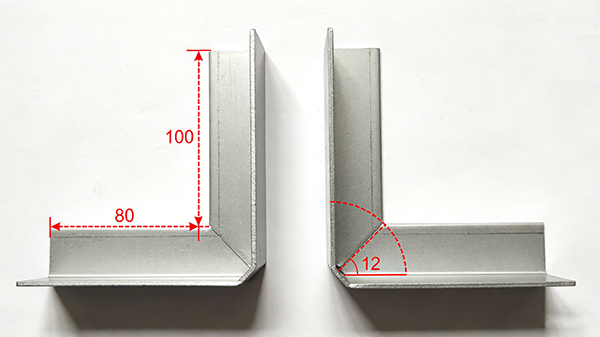
What it is: When metal is bent, it wants to spring back toward its original shape. The harder the material, the more it springs.
This is one of the most common reasons sheet metal parts don’t fit. A part that’s supposed to have a 90-degree bend might come out at 91 degrees. That one degree might not look like much on its own. But when you’re trying to assemble a box with four sides, that one degree multiplies. Suddenly, nothing lines up.
How to fix it:
Design with springback in mind. Different materials need different compensation.
Work with a fabricator who uses CNC press brakes with automatic angle correction.
For critical features, specify a tolerance on the bend angle, not just the overall dimension.
What we do: We calculate springback based on material type and thickness before we even start bending. Our machines measure the bend angle during the process and adjust in real time.
2. Flat Pattern Errors
What it is: The flat pattern—the shape of the part before it gets bent—has to be exactly right. If the flat pattern is off by even a millimeter, every bend after that will be off.
I’ve seen engineers take a 3D model, hit the “flatten” button, and send that flat pattern straight to the laser cutter. The problem is that flatten function doesn’t always account for how the material actually stretches and compresses during bending. It gives you a theoretical shape. Reality often looks different.
How to fix it:
Use the right K-factor for your material. This isn’t a universal number. Different materials, different thicknesses, different tooling all change it.
Test before you run large batches. Cut one part, bend it, and measure. Adjust the flat pattern if needed.
Work with a fabricator who does their own flat pattern development rather than just trusting your file.
What we do: We run a test bend on a sample piece of your material to dial in the K-factor. Then we recalculate the flat pattern. We’ve caught many issues this way before they hit production.
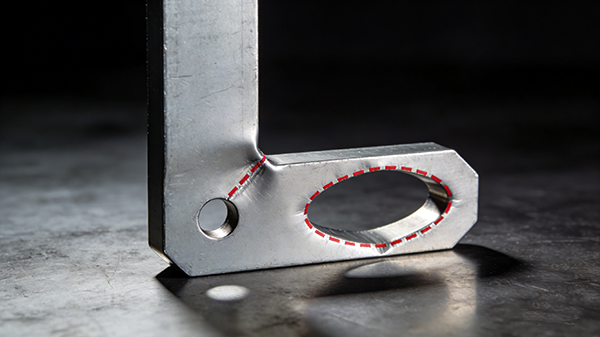
3. Hole Deformation from Punching
What it is: When you punch a hole near a bend line, that hole can stretch and distort during the bending process.
This is a classic trap. The hole looks fine on the flat sheet. But after bending, that once-perfectly-round hole is now an oval. Or worse, it’s cracked.
How to fix it:
Keep holes at least 2.5 times the material thickness away from any bend line.
If you can’t move the hole, consider machining it after bending.
For thicker materials or tight bend radii, add relief cuts near the hole.
What we do: We review your design before we start. If we see a hole too close to a bend, we’ll flag it. Sometimes we can suggest moving it. Sometimes we adjust the bend sequence to minimize distortion.
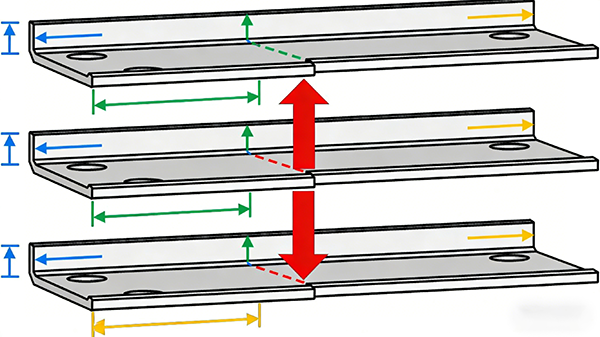
4. Tolerances Stacking Up
What it is: Every part has tolerances. Every feature has tolerances. When you put multiple parts together, those tolerances add up. A 0.2mm gap here plus a 0.2mm gap there equals a 0.4mm misalignment.
This is the silent killer of assemblies. No single part is out of spec. But when you put them together, nothing fits.
How to fix it:
Be realistic about tolerances. Don’t put ±0.1mm on every dimension. Most features don’t need it.
Identify the critical features—the ones that actually matter for fit. Put tight tolerances there. Let everything else breathe.
Think about how parts go together. If Part A bolts to Part B, control the hole locations that matter for that interface.
What we do: We talk to you about what the assembly actually does. Which features are critical? Which ones are just cosmetic? We’ll help you apply tolerances where they matter and save you money where they don’t.
5. Welding Distortion
What it is: Welding adds heat. Heat makes metal expand and contract. When you weld two parts together, that heat can pull them out of shape.
I’ve seen beautiful, perfectly formed enclosures go into the welding station and come out looking like twisted boxes. It’s not that the welder did anything wrong. It’s just that metal moves when you heat it.
How to fix it:
Weld in short, staggered segments instead of one continuous bead. Let the part cool between passes.
Use fixturing to hold parts in place during welding.
Consider welding in a sequence that balances heat distribution.
For critical assemblies, plan for post-weld machining on important features.
What we do: We plan the welding sequence before we strike the first arc. We use fixtures to hold parts in position. For high-precision assemblies, we’ll machine critical mounting surfaces after welding is complete.
6. Inconsistent Material
What it is: Not all steel is the same. Different batches of the same material can behave differently. Hardness can vary. Grain direction matters.
If you’re running the same part for months, and suddenly a batch doesn’t fit, check your material. The steel that worked perfectly last time might have slightly different properties this time.
How to fix it:
Source material from reputable suppliers with consistent quality.
For critical applications, specify material certifications.
Let your fabricator know if your application is sensitive to material variations.
What we do: We track material certifications and batch numbers. If something changes, we adjust our process accordingly.
How to Prevent Fit Issues Before They Happen
The best time to solve fit issues is before any metal gets cut. Here’s what I recommend.
1. Get Your Fabricator Involved Early
I can’t say this enough. Send your design to us before you finalize it. We’ll look at it and tell you what’s going to be easy, what’s going to be hard, and where a small change could save you headaches later.
Most fit issues I see could have been caught with a simple drawing review.
2. Build a Prototype First
If your assembly is complex, or if you’re using a new design, run a few prototypes before you order hundreds or thousands.
We offer prototype services for exactly this reason. Cut a few parts. Assemble them. See what works and what doesn’t. Adjust. Then go to production.
A small investment in prototyping saves a lot of money in scrap.
3. Communicate the Critical Features
Your drawing might have 50 dimensions. But only 5 of them actually matter for how the parts go together. Tell us which ones.
Mark them on your drawing. Put a note: “Critical Fit” or “Control Dimension.” We’ll pay extra attention to those features during setup and inspection.
4. Be Clear About the Assembly
We’re good at reading drawings. But we’re better when we understand what you’re building.
Let us know how the parts go together. What’s the mating part? What’s the function? The more we understand, the better we can spot potential issues.
What to Do When Parts Don't Fit
Sometimes, despite everyone’s best efforts, things go wrong. Here’s how to handle it.
Don’t force it. If parts don’t fit, stop. Forcing them can damage the parts and hide the real problem.
Measure. Put the parts on a surface plate. Check critical dimensions. Find out what’s actually off.
Talk to your fabricator. Call them. Send pictures. Send measurements. A good fabricator will want to know what went wrong and will work with you to fix it.
Determine the root cause. Was it a setup issue? A material issue? A design issue? Fix the cause, not just the symptom.
Decide on the fix. Sometimes rework is possible. Sometimes replacement is faster. Sometimes a slight design change can make the assembly work without redoing everything.
Final Thoughts
Sheet metal parts not fitting during assembly is frustrating. But it’s also avoidable.
Most fit issues come down to the same few things: springback, flat pattern accuracy, hole placement near bends, tolerance stacking, welding distortion, and material consistency.
The best way to avoid these problems is to get your fabricator involved early, prototype before you scale up, and communicate clearly about what matters.
We’ve been doing this for twenty years. We’ve seen just about every fit issue there is. And we’ve learned how to avoid them.
If you’re working on a new design or dealing with fit issues on an existing one, reach out. We’re happy to take a look and help you get it right.
Have questions about your sheet metal assembly? Send us your drawing. We’ll review it and give you honest feedback on potential fit issues and how to avoid them.